
Key Tips Discussed in This Blog
- Know your local risks by understanding which natural disasters are most likely in your area (wildfires, floods, hurricanes, winter storms).
- Make a plan to set up emergency contacts, choose a meeting place, and register with local support services if you have mobility challenges.
- Pack an emergency kit that includes essentials like food, water, medications, a flashlight, and comfort items to last at least 72 hours.
- Protect important documents. Keep copies of ID, health cards, insurance papers, and prescriptions in a waterproof folder.
- Stay informed and ready. Sign up for alerts, keep a battery-powered radio, and have a pre-packed “go bag” for quick evacuation.
Natural disasters in Canada—wildfires, floods, tornadoes—are becoming more frequent and more severe. In recent years, devastating events have forced thousands to evacuate their homes, especially in provinces like British Columbia, Alberta, Ontario, and Nova Scotia.
For older adults, the thought of leaving home on short notice can be especially stressful. Many seniors have lived in the same home for decades, surrounded by memories, routines, and familiar belongings. Leaving all of that behind, even temporarily, can feel unsettling. But with some planning and the right tools in place, you can feel confident and prepared.
Before You Evacuate: Steps to Prepare
Preparation is the single most important step you can take to reduce stress in an emergency. Here are some ways to ensure you’re ready:
1. Understand Local Risks
Every region in Canada faces unique hazards. For example:
- Wildfires in Western Canada (BC, Alberta).
- Flooding in Manitoba, Quebec, and Ontario.
- Hurricanes in Atlantic provinces.
- Severe winter storms across the country.
Take time to learn which risks are most likely in your community. Many municipalities publish hazard maps and safety guides that can be accessed online or requested in print.
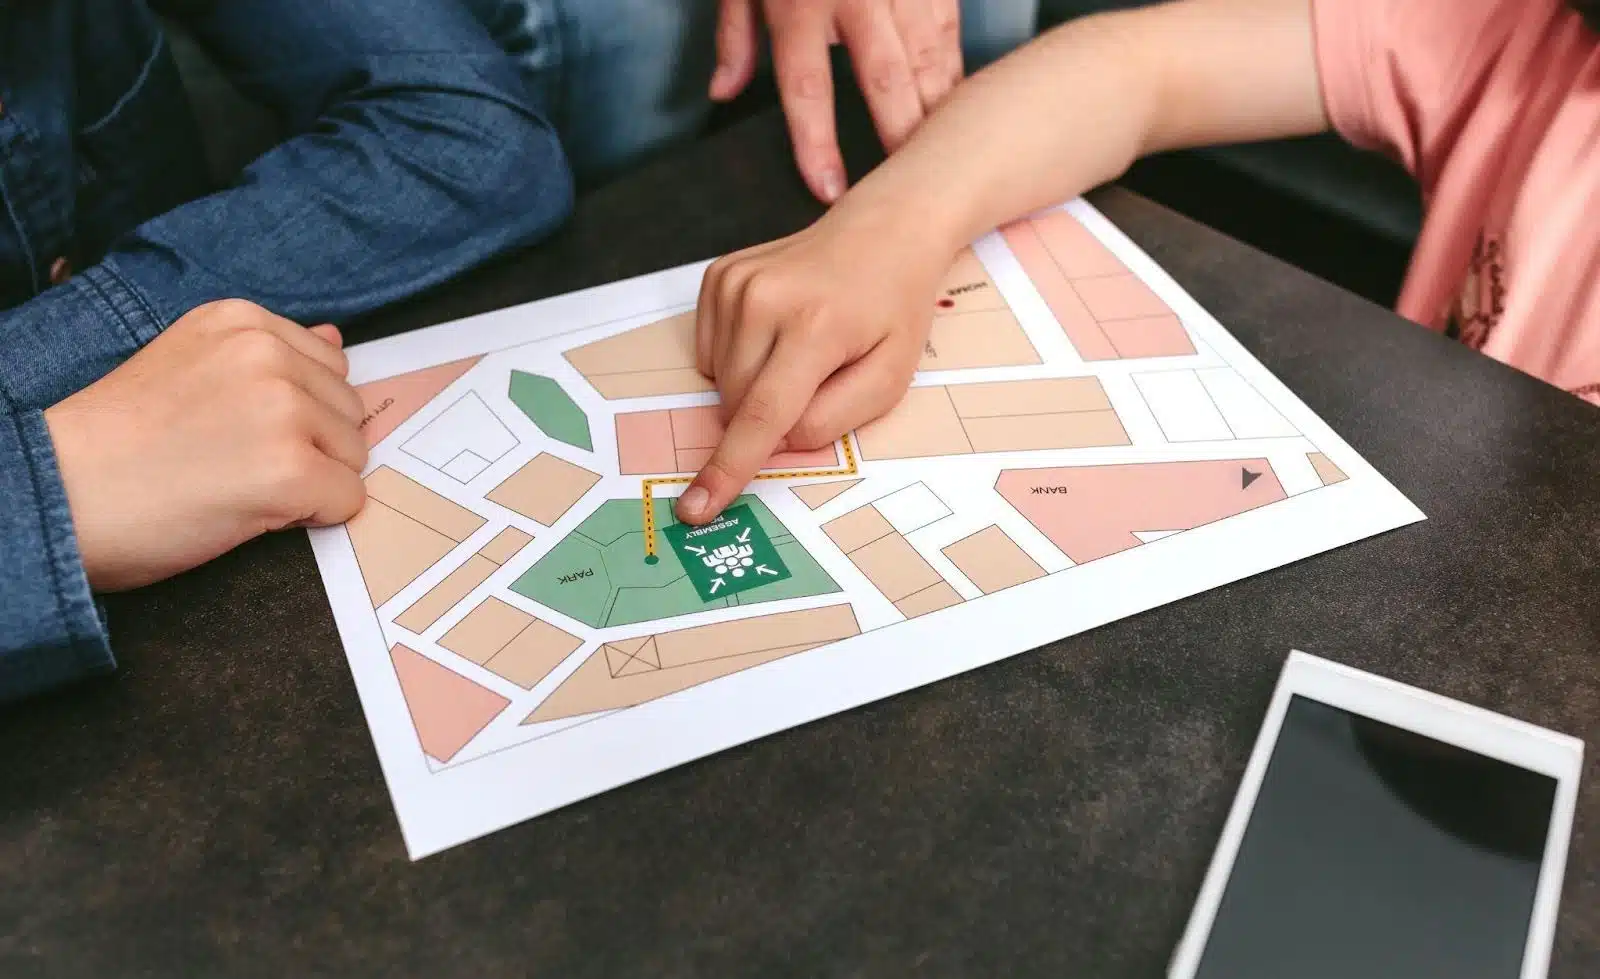
2. Create a Communication and Evacuation Plan
Designate a trusted emergency contact (preferably both inside and outside your province). Write their name and phone number on a card you can keep in your wallet. Decide on a meeting place—such as a community centre or relative’s home—where family or caregivers will know to look for you.
If you have mobility concerns, speak with your local fire department or community emergency office in advance. Many municipalities have “vulnerable persons registries” where seniors can register to receive priority evacuation support.
3. Assemble a Disaster Preparedness Kit
Start small and build your kit over time. Essentials include bottled water, canned food, medications, and a flashlight. Over the weeks, add comfort items like a blanket, extra socks, and even a book or crossword puzzle to help pass the time in shelters.
4. Safeguard Important Documents
Gather photocopies of ID, health cards, insurance papers, and a list of prescriptions. Store them in a waterproof folder. Keep a second copy with a trusted friend or family member, just in case.
5. Know How to Turn Off Utilities
Ask a neighbour, family member, or local utility company to show you how to safely turn off electricity, gas, and water. In some cases, this step can prevent serious damage to your home.
Stay Informed About Local Emergencies
Reliable information can give you peace of mind during a crisis. Here are simple ways to stay updated:
- Sign up for emergency alerts in your province.
- Monitor Alert Ready and Environment Canada for severe weather warnings.
- Keep a battery-powered radio in case your phone loses charge.
- Ask a family member to set up alerts on your mobile device if you’re unsure how.
- Write down important phone numbers (family, neighbours, emergency services) in large print.
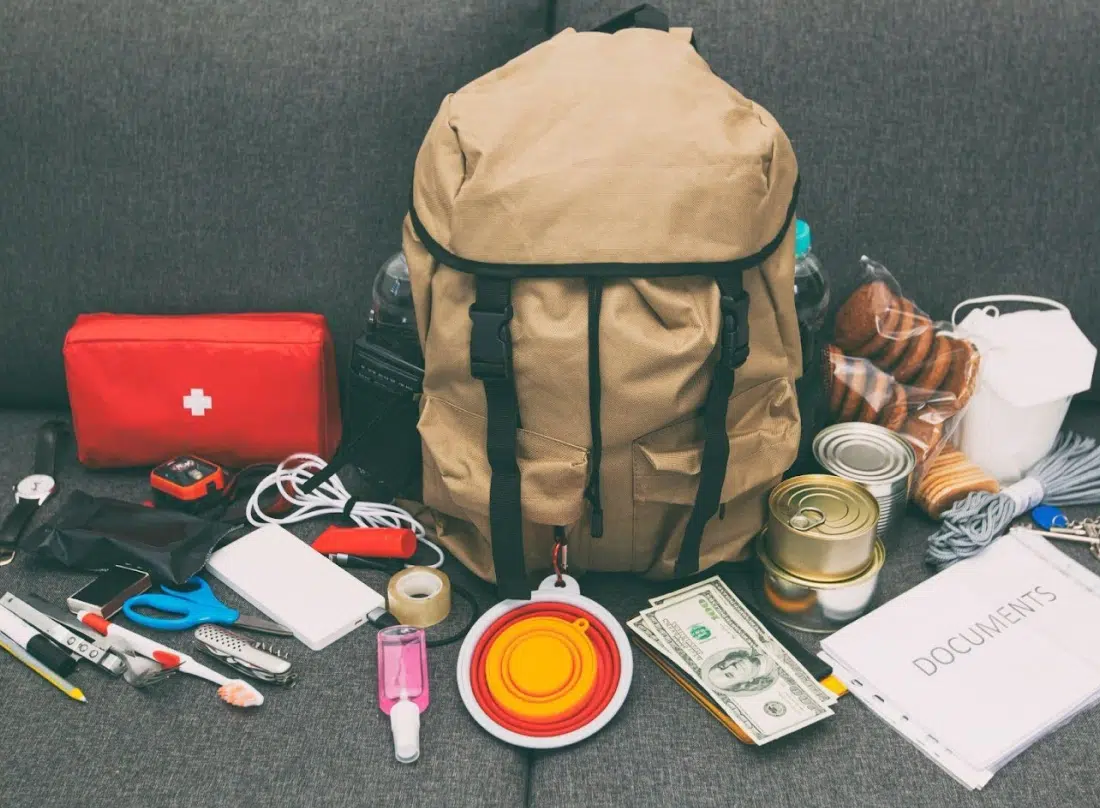
Emergency Evacuation Checklist: What Seniors Should Pack
Leaving home in a hurry can feel overwhelming. A pre-packed “go bag” helps reduce stress. Here’s a list designed with older adults in mind:
Personal Items and Essentials
- Change of clothes and warm layers
- Whistle or noisemaker to call for help
- Flashlight with spare batteries
- Phone charger and power bank
Medical and Mobility Supplies
- Prescriptions (with at least one week’s supply)
- Extra hearing aid batteries
- Glasses, mobility aids, or dentures
- A written list of medications and allergies
Important Documents to Bring
- Government-issued ID
- Provincial health card
- Insurance information
- Emergency contacts
Pet Supplies (If Applicable)
- Food and bottled water
- Bowls, leash, or carrier
- Towels or blankets
Tip: Keep your kit in a lightweight backpack or rolling bag so it’s easier to carry if you have limited mobility.
How to Build Your Emergency Preparedness Kit
Closely tied to your evacuation checklist is your emergency preparedness kit. This kit should keep you safe, healthy, and comfortable for at least 72 hours if you are away from home or in a shelter. Packing ahead of time means you won’t have to scramble during an emergency, which can save valuable time.
Choosing the Right Bag
Select a bag that is lightweight, waterproof, and easy to carry. A rolling suitcase, backpack, or even a duffel bag with a shoulder strap can be good choices. For seniors with mobility issues, a small wheeled bag may be the safest option.
Attach a large label with your name, address, and phone number. For extra security, consider adding an Airtag, Tile, or other tracker so your kit can be located if misplaced.
Personal Protective Equipment (PPE)
Emergencies sometimes bring hazards such as smoke, dust, or infectious illnesses in crowded shelters. Keep PPE on hand, such as:
- A lightweight jacket or poncho for rain and cold.
- Face masks (medical or cloth).
- Protective gloves if you may be handling debris.
Essential Items for Your Kit
1. Food and Water Supplies
- Non-perishable Foods: canned goods, protein bars, instant oatmeal, or dried fruit.
- Comfort Foods: small items like tea bags or hard candies can provide a sense of normalcy.
- Water: Pack bottled water for at least three days (2 litres per person, per day).
- Backup Purification: Consider a small water filtration system, purification tablets, or a portable straw filter.
2. Health and Hygiene Items
- Travel-sized toiletries like a toothbrush, toothpaste, deodorant, soap, and shampoo.
- Hand sanitizer and wet wipes for when clean water isn’t available.
- Masks for health protection and smoke inhalation prevention.
- Feminine hygiene products, if needed.
- Spare eyeglasses or reading glasses in case your main pair is lost.
3. Emergency Communication Tools
- Flashlight with extra batteries (choose one that is bright and easy to switch on/off).
- A portable radio to receive emergency broadcasts if cell towers are down.
- Fully charged power bank for your phone.
- A whistle to call for help if your voice can’t carry.
4. First Aid Supplies
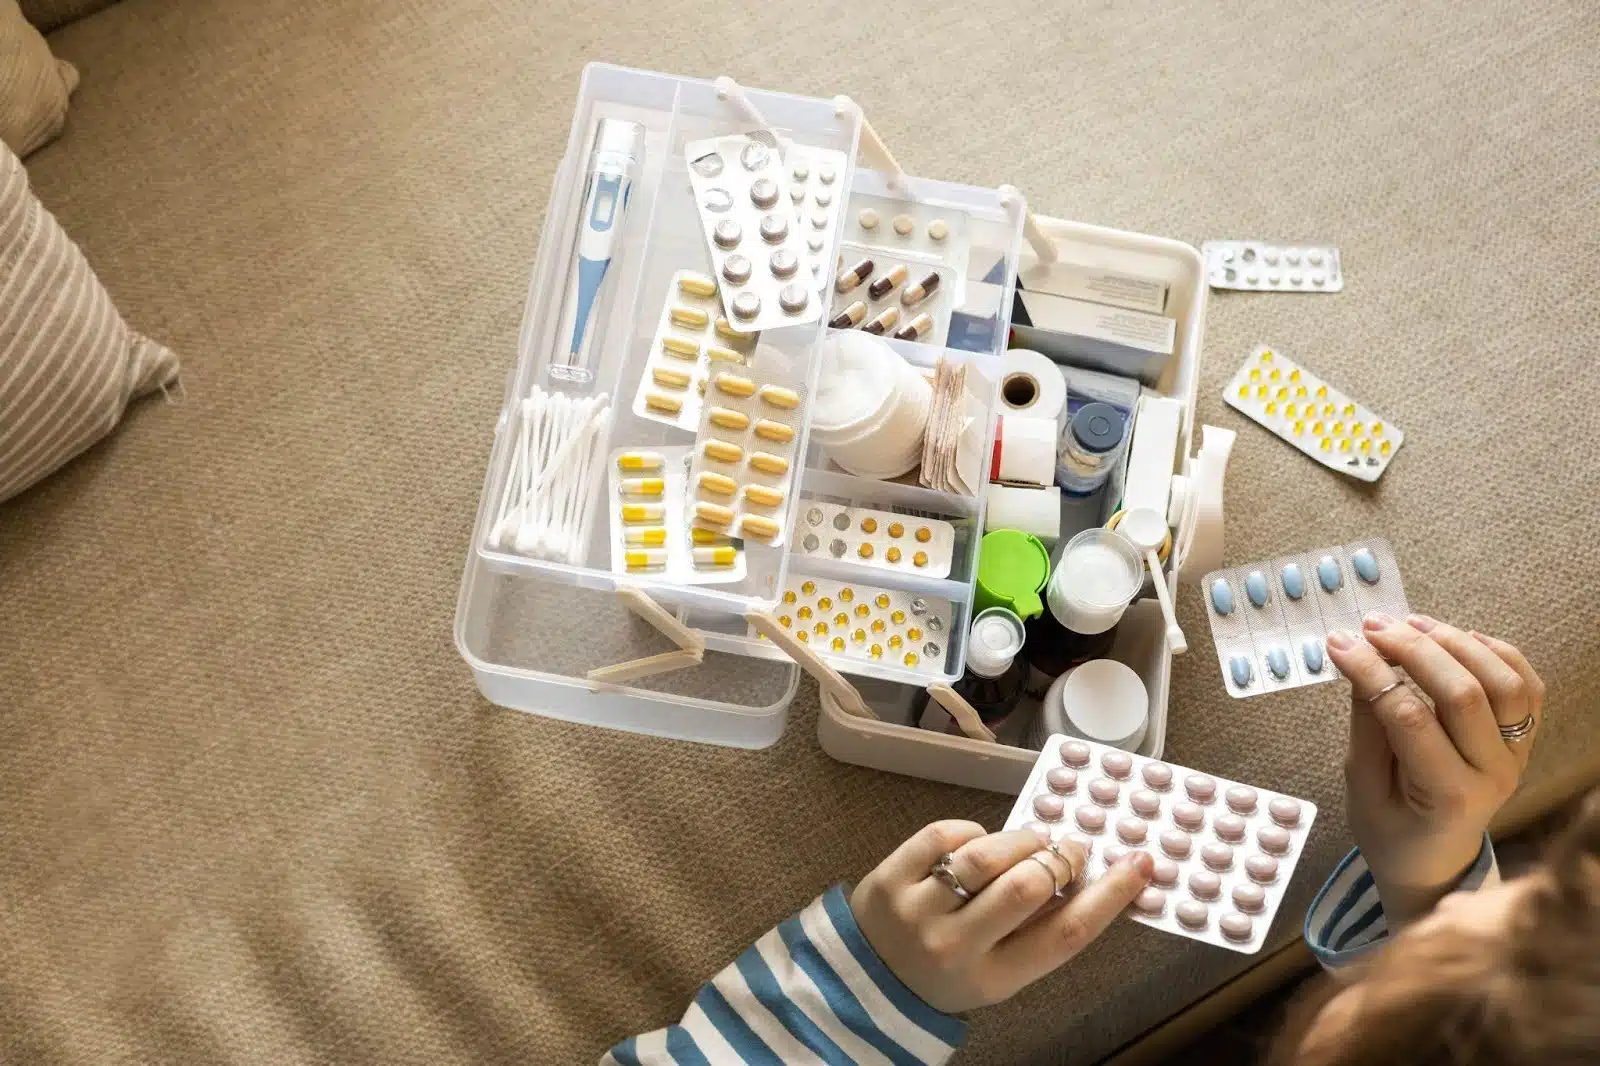
- Adhesive bandages in various sizes.
- Antiseptic wipes and burn gel.
- Medical tape, gauze pads, and gloves.
- Tweezers for splinters or ticks.
- Small scissors or safety shears.
- Prescription medications with instructions written clearly.
- A printed list of allergies, medications, and emergency contacts in large, legible print.
Lifeline Equipment: Evacuation Protocols
Your Lifeline medical alert system is a lifeline in every sense of the word. Here’s how to manage your equipment during an evacuation:
- Taking Your Equipment with You: If you use a mobile device like Lifeline On the Go, always pack it with your charger. Keep it in a zippered pouch inside your emergency kit so you know exactly where it is.
- Updating Your Location with Lifeline: If you’re relocating temporarily or permanently, call 1-800-387-1215 to update your address. This ensures that Lifeline responders can dispatch help to your correct location.
- What to Do if Equipment is Left Behind: If you cannot take your equipment, turn it off before leaving. Once you return, press the button to reconnect and confirm it’s functioning.
- Testing Equipment Upon Returning Home: Testing is quick and easy: press your Lifeline button to make a test call. If the device was damaged, Lifeline can send you a replacement. Don’t hesitate to call their support team if you’re uncertain—your safety comes first.
Staying Safe During an Evacuation
It’s normal to feel anxious, scared, and upset during an evacuation. Preparing your checklist and emergency kit can help ease some stress of the ordeal. Here are some other things you can do to help you stay calm and safe:
Follow Local Authorities’ Instructions
Always evacuate promptly when instructed. Delaying can increase your risk and may put first responders in danger if they need to rescue you.
Keep in Touch with Family and Friends
- Carry a small address book with important phone numbers in case your phone dies.
- Set up a buddy system with neighbours so you can check on each other.
- Call or text a relative once you’ve arrived at your safe location.
Find Official Emergency Updates
- Emergency Info BC
- BC Wildfire Dashboard
- Alberta Emergency Alert
- Environment Canada weather alerts
- Government of Canada Emergency Preparedness for Older Adults
- Local municipal websites and news networks
Additional Canadian Resources for Seniors
If you’d like extra guidance or need help building your plan, these Canadian organizations provide trusted, up-to-date support:
- Canadian Red Cross – Emergency Resources: Offers detailed guides, workshops, and printable checklists to help seniors and families prepare for emergencies. They also provide on-the-ground support during disasters, including shelters, food, and supplies.
- Get Prepared – Public Safety Canada: A national program from Public Safety Canada, this system helps Canadians take simple, practical steps to be ready for emergencies. The campaign encourages households to:
- Understand the risks in their area (such as floods, wildfires, or storms).
- Make a family emergency plan so everyone knows what to do.
- Build a 72-hour emergency kit with food, water, and essentials.
- Safety During Emergencies (Ontario): A provincial guide created with seniors in mind. It explains step-by-step how to build a plan, what to pack, and how to stay safe during different types of disasters.
- Make Your Emergency Plan (BC):British Columbia’s version of a tailored emergency guide, with tips for older adults, caregivers, and people with medical or mobility challenges.
- 211 Canada: A free, confidential helpline you can dial from anywhere in Canada. It connects you to community supports, shelters, food programs, and mental health resources during and after an emergency. Operators are available 24/7.
Remember, you don’t need to do everything all at once. Start small—add a few items to your kit this week, write down your emergency contacts, or register with your local emergency office. Little by little, you’ll build a plan that gives you peace of mind.
Emergencies can be unpredictable, but with the right preparation, you’ll know you have the tools and support to get through them confidently.
About the Author
What You Should Do Now:
Here are 5 ways we can help you or your loved one live safer and more independently at home as long as possible:
- Get our latest tips, tools and resources straight to your inbox. Sign up for our monthly newsletter.
- Not sure if the time is right for a medical alert service? Take this quick assessment to find out.
- If you would like to learn how to live a healthier and safer lifestyle, go to our blog or visit our resources section, where you can read and download guides.
- Wondering which medical alert system company is the best for your needs? We’ve put together a guide comparing the best medical alert systems for you.